Alright, people! I’m going to let you in on the secrets of one of my new favorite “make at home instead of buy” things.
Kombucha manufacturers make a lot of health claims (all of which I take with a grain of salt because of my experience with the FDA and how they determine if a product is safe and effective) but I am basing my love for this life elixir totally on experience. I invite you to do your own research and taste a few different kinds before making any rash decisions on the stuff (remember, it can be an acquired taste) but here is some of the healthiness that you’ll find in a properly brewed batch:
- Vitamin C
- Vitamin B
- Lactic acid
- various amino acids
- various metabolic enzymes
- contain probiotics
- assist to alkalinize the blood
- detoxify the liver
- increase metabolism
- improve digestion
- alleviate constipation
- cancer prevention
- reduce blood pressure
- relieve headaches & migranes
- aid healthy cell regeneration
- reduce kidney stones
- high in polyphenols
- improve eyesight
- reduce excema – softens the skin
- prevent artheriosclerosis
- speed healing of ulcers
- reduce gray hair
- help clear up candida & yeast infections
- boost energy – helps with chronic fatigue
- high in antioxidants – destroy free-radicals that cause cancer
- rebuild connective tissue – helps with arthritis, gout, asthma, rheumatism
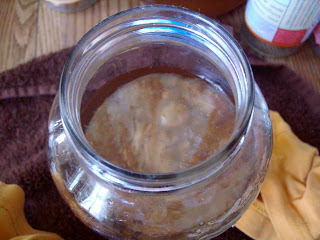
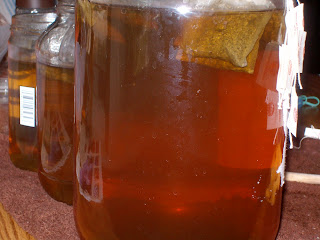
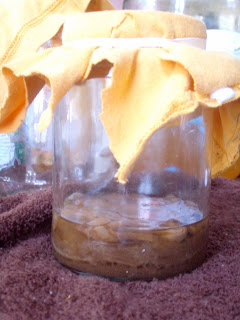
We purchased our first SCOBY from Cultures for Health, but you can also get cultures, and even entire brewing kits at Kombucha Kamp. The SCOBY looks pretty gross (see below) but it’s full of life! SCOBY stands for Symbiotic Culture Of Bacteria and Yeast.
- a glass jar or other glass or oak brewing vessel (my advice? Start with a quart sized jar, then go bigger), sterilized
- 1 cup starter – either commercially sold kombucha or raw apple cider vinegar
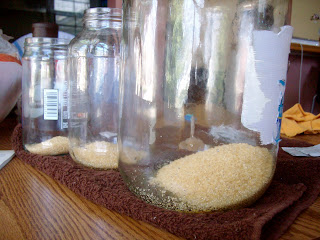
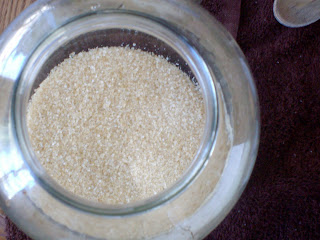
- 1 cup sugar (preferably organic, we like to keep our kombucha clean)
- 2-4 tea bags green, black, oolong, or english breakfast tea…NO HERBALS! If you have loose leaf tea, 1 tsp = 1 tea bag
- 4 cups good ol’ H2O
- a mama SCOBY
- a cloth cover, old clean t-shirts work well, but cheesecloth is too porous and will let crap into your brew. Coffee filters are also good for this
- a rubber band
…aaand directions to make a batch:
- boil 4 cups of water
- add sugar, hot water and tea bags to the brewing vessel, leaving a few inches at the top for breathing room
- let the sweet tea come to room temperature before proceeding, you can either put it in the fridge or add some cold water to the mix if you are impatient
- when the tea is (finally) at room temp, you can add your starter and SCOBY to the mix
- cover the top of the jar with your cloth and secure it with a rubber band


- set in a warm location, out of direct sunlight
- DO NOT DISTURB for 7 days
- after a week, taste your kombucha to see if the flavor is to your liking. If it’s too tart, reduce the brewing time for the next batch. If it’s too sweet extend brewing time (you can leave it up to 30 days). Taste it every day until you reach the best flavor according to your preference
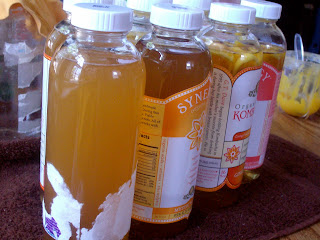
- Bottle and (if you want to) flavor the kombucha and start your next batch
- In most cases, your SCOBY will have a baby with every new batch. If you end up with more SCOBYs than brewing vessels, start a SCOBY hotel (see picture below). A SCOBY hotel is really just another clean jar, filled with a little bit of kombucha and all your extra SCOBYs. We also found this very helpful if you loose any batches to mold!
- Seriously, make sure you don’t touch the brewing vessel for at least a week. The new baby SCOBYs are very delicate and don’t like to be disturbed.
- Keep the brew warm! I’m talking 65-85 degrees. Most of the good places to keep the kombucha while it’s brewing in our house is AT MOST 60 degrees in the winter – no good. This can definitely invite mold growth and stagnated brewing. It’s like putting your booch in the fridge. We remedied this by purchasing a kombucha heater – it was the absolute best purchase we could have made. Now we get delicious, yeast-y brews every time and very healthy new SCOBYs
- Absolutely, 100% throw away any kombucha that has mold on it. Do not pass go. Do not collect $200.


